Cute Funny Drawings Tumblr Cute Fat Green Dragon Drawings
Anonymous asked:
Do you have any advice on dragon wings? My best friend has a character with these huge dragon wings and horns anf I always have an issue drawing her wings.
![]()
In many draconic renditions - artists often refer back to our own animal kingdom when designing their wings. Particularly the wings of other airborne animals of our world. Most commonly the bird or the bat.

Despite evolution having separated our arms from the birds' waaaayyy back, there's still quite the resemblance between the primary structure between our arms from their wings.

You have the "upper arm" at A, the "forearm" at B and then an extended 'version' of the "hand palm" along with its fingers from C-E. Looking at your own arm, and assuming the pose of the wing above- you should be able to recreate it quite closely - so from here on out, you know that you're able to loosely reference your own body when planning out the structure of a wing.

http://www.dinosaur-world.com/feathered_dinosaurs/wing_evolution.htm
This should help you greatly when drawing in the muscles and feathers too.
However, what we mostly see in popular media is dragon wings that rely heavier on bats for reference. There isn't -that- much difference in the bone structure itself.
What separates the bat wing from the bird's wing is that the phalangers, or "fingers" extend way into the membrane. Usually, there are between 3 - 4 phalanges in a wing ( not including the thumb ). some also put a phalange at the base of the elbow to add more shape to the wing, but ultimately - it's not necessary.

http://theamazingbat.com/bat-natural-history/the-bat-wing/

Above we have an attempt at mapping out the bone structure of a wing based on a batwing. As visible - the structure of the "arm" remains incredibly similar to that of a bird's, and by that extension - a human's. The phalange's length far extends the combined length of the "arm", to give the membrane volume enough to be able to lift your creature. There's an equal-ish amount of distance from the three phalangers extending from the " palm " (discounting the thumb), but a greater distance between the bottom phalange, to the phalange on the "elbow ".

Lacing skin and muscles over these limbs is relatively simple, as the weight of the wing must be light in order to not burden the creature in flight. Some artists decide to depict the "arms" a lot bulkier - nothing wrong with that, it doesn't really break with our suspension of disbelief, but it does stray away from a more aerodynamic look.

Drawing the membranes can be a bit tricky at first, due to the elasticity of it. However, a good thumbrule should be that the dip of the curve should be deeper if the phalanges are at rest, close to one another. And less deep / more straight if the phalanges are spread far apart - stretching the membrane.

In some designs, you might be tempted to remove the thumb for a more elegant look. Some creatures are drawn with hook-like thumbs on top of their " palm ", to give the impression that the creature can latch and hang onto ledges.
Both the bat and the bird has some sort of thumb going on. But the unlike the bird, whose thumb is moreso an invisible bone - the bat's thumb is fully developed and helps it cling to surfaces when at rest.
- mod wackart ( ko-fi )
More you might like
Tutorial Master Post
This here is an ever-evolving list of tutorials, categorized and linked for your convenience! Hopefully, this post will continue to update as we find new tutorials with helpful insights.
Alternatively, you're more than welcome to peruse the blog's various tags too if you wish to not venture too far!
Keep reading
Anonymous asked:
Hello! Could you do a tutorial on the anatomy of centaur-like beings (half four legged being half human) and how to make intentional misproportions that come with merging beings and make them look purposeful?? Ily ❤️
![]()
Classic mythological creatures such as the centaur is a stable in many fantasy universes. And for good reason, their design is simply fascinating.
I personally have a soft spot for any taur creature that mixes unconventional animals with humans, as well as some of the classic human/animal hybrids seen dotted around folklore ( and frequently use these ideas for my own creations ). Though, as it is when you glue a human and an animal together, the structural "integrity" of the resulting creature requires quite a lot of suspension of disbelief to really justify.
Especially with combinations in which the human half substitutes the head of a quadruped ( four legged creature ). We can usually look beyond it for the sake of the story and the storyworld. However, if you want to make taurs look like they "could" exist and work in a more "realistic" context, then here's a few pointers.
This is by no means an extensive list, it's just a few things i've picked up on over the years when designing creatures, especially taurs.

http://www.supercoloring.com/da/tegninger-til-farvelaegning/centaur

Let's use the centaur as our base
You can apply the following tips to just about any creature that you think could benefit from the anatomical adjustments. The centaur is just a good "blank canvas" for us to work with. So let's see.
The centaur is made up of two halves, the lower half of a horse and the upper half ( torso and head ) of a human. These two halves blend together seamlessly at the base of the horses 'neck' and the human's pelvis.

Now there's almost always a few glaring 'issues' that i pick up on when seeing centaurs in media, and it has something to do with the placement and lean of the human half. In this particular illustration ^, the human half is perched at the base of the horse's neck, like any other traditional taur. -But- the human half's slightly forward placement and forward lean shifts the point of gravity in front of the horsehalf's legs, and puts immense strain on the backmuscles, as there is no supporting tissue to lift or lower the human torso.

https://narnia.fandom.com/index.php?title=Lightning_Bolt&showall=1
I tried to look for a better picture but couldn't find any, so sorry about the poor quality.
Lighting Bolt here has a very prominent case of what i just described. The torso is propped forward due to how the designers made him a direct extension of the horse's neck, which would naturally lean forward too.
Though this can come across as decent looking on a child character, who is rather skinny, and probably always in some kind of motion. The default pose of a character like this, would be one of drooping the human half in front of the horse's half due to the lack of structural support (musclemas) that would default the character to stand upright when idle. Which would look a little odd. Afterall the human spine is not made to hold itself at a 45 degree angle whenever we relax. In fact, that' a hugely detrimental posture to maintain for extended periods of time.
What's more

The direct fusing of the horse's neck with the human torso ( and thusly fusing the two spines together in their original shapes ), means that the creature's spine is ultimately seperated into two, which leaves a lot of strain on the particular point where the two spines connect. This can cause massive issues for the taur when moving around or doing high-intensity activities such as running ( and don't even get me started on lifting things ).
If we were to address this problem, we'd have to make a few adjustments.

^ Firstly, we want to make sure that the front of the human's torso align's directly with the horse's. Like this, we place all the point of gravity right between the horse's legs, and not somewhere in front of it.
On top of this, we are going to want to have the human half leaning back a little bit, so that, once relaxed - the creature will hang back towards the horse's half, and not in front of the itself..
Additionally, i've added more mass to the legs to make sure they could carry the top half. Now: horses do have notoriously frail legs, so if you want to keep the disproportion of skinny legs that's up to you, i personally just prefer my taurs looking somewhat robust (though contrasting a heavy top with a very skinny set of legs could potentially make for an interesting sihlouette in more abstract styles ).
Furthermore, i slapped on a long tail to counterbalance the weight from the creature's front. This is to distribute the weight of the creature more evenly. As well as giving the taur a " rudder" that can help it direct itself when running.

This also means that we can rid ourselves of the gnarly weak point in the fusing of the two spines. Now we can draw an elongated spine that reaches all the way from the human head to the tip of the tail. This is, technically speaking, a more sustainable structure that won't snap easily under stress.

Now, i mentioned something about mass
I mentioned earlier that there was no musclemass to support the lowering and lifting of the human head. A lack of this mass would mean that the human half was restrained to sitting rather statically on the horsehalf, only able to move its upper half ( above the ribcage potentially ). This makes for an immobile creature.
So to counter this, we add a heaping helping of mass at the base of the human's spine, and the back of the horse's "neck". This muscle would work somewhat like our bicep. Pulling and relaxing to allow the human half to lift or lower itself. Sure, it probably won't ever be able to reach a 90 degree bend like we humans can, but with just a little bit of mass, they'll at least be able to move a little bit.
Naturally; the more mass you add to this lump - the more likely it is that they'll be able to bend forward more, consider this bit a little bit like a rubber band, that slims up when the taur leans forward, and bulks up when they lean back. .

Here's another fun thing
Taurs in movies are typically pretty shapely, slender or muscular creatures. And that's all fun and games - anyone who knows me and my art will tell you that i love buff people. But there's so many ways one can pick and mix between bodytypes and hybrid blends.
I personally love studying the specific subspecies of horse/cow/animal so that i can find just the right breed that would fit with the character or creature i'm making. Like matching heavy build characters with draftshorses, or sleek, petite characters with breeds such as the Akhal-Teke.
The point is that you can make a creature look really interesting by matching out the bodytypes between horse and human ( and opposite, contrast really heavy build horse-breeds with really sleek human tops, or vice versa, if you know how to work your sihlouettes and shapes) .Matching bodytypes to breeds would also make sense in an anatomical context, as the creature itself would distribute mass somewhat evenly across the two halves by virtue of sharing the same metabolism.
Additionally, playing with colours, shapes and details can make for a really interesting creature. Don't be afraid to go a little wild when making hybrid creatures, especially if you, like me - don't mind the design getting a little weird and different.

- Mod wackart ( ko-fi )
Anonymous asked:
i know submissions are closed right now and i believe i saw you said you don't do private redlines, but could we submit them anonymously?
![]()
I 'm not sure how that would work, but if you find some way to make yourself anonymous whilst still submitting to our inbox proper, then I don't see why not? As long as you're all right with your redline being posted publicly.
- mod wackart
Mod Seraphtonin, chiming in: also, note that submitting anonymously means we can't tag you in the redline once we're done!

How can I give this more personality. along with making a hood on the hoodie look like a hood?
There are a few ways that you can add more personality to this piece. I'll settle with the posture and some minor details. :)

Often we can enhance the sense of personality in a piece by simply pushing our expressions and gesture more. In this case, I would curve the back a lot more, so that the chest was pushed out, and the rear tugged back. This gives us a dramatic curve which pushes the momentum of the character forward somewhat.
To complement this ( make the curve more visible ) - I pulled the character's left arm back to create a little gap between the body and the limb.
Tilting the character's head is one also an easy way to add a bit more dynamism to the pose, this also brings forward that inquisitive/curious look.

As for hoodies and heavy textiles in general, the fabric will bunch up around the character's neck, and rest on top of it all the way around. This means a lot of large, soft folds that follow the mass of the hood around the neck. If the hood is particularly large, it'll rest "on top" of the shoulder, and overlay the curvature of it.

A few extra tidbits in regards to the personality of the piece could be added to the expression. Lowering the eyebrow on the left eye, while heightening the other ( and increasing the size of the open eye ) pushes the expression further, and communicates it more blatantly. I've added the tongue just as a test. It is one of those trademark features you see in the character's trying to study something, whether or not it fits with your character is of course up to you.
- mod wackart ( ko-fi )

Hello, I was trying to draw a scene from the Magnus Archives where a character's hand is burned while he shakes the other person's hand. I was wondering if you could help me with the expression of pain and making the picture a little more dynamic? Many thanks!
I haven't personally listened to Magnus Archives, so if there are any inconsistencies in terms of the content versus the scene, feel free to daintly skip over that.
Now let's take a look at some pain.

You were already a good way's there. You've observed that we tend to open our mouths when we are in moderate to severe pain. This often comes as reflex as our facial muscles clench, which in some people pry our lips apart and jaw down.
I've had the character open his mouth more, and tugged the corners of his lips into a two-point rectangular shape ( one following the top lip, another following the bottom lip ). This is because we tend to open our mouths wider when we're in severe pain.
If you draw somewhat more toony or semi-realistic art, you can enhance the intensity of the expression by showing a bit the character's gums. In real life, pushing our lips that far back is difficult if not impossible to some people, but in more abstract styles we can get away with going just that extra step.
You've also included the line from the character's nostril to the corner of his mouth, this is a line I also use myself a lot, as it describes just how tense the cheek is.
I've tugged up the lower eyelid to bring that tension into the upper half of his face as well. The force exerted on the muscles around the eye makes the lids meet in an upward arch rather than a downward. I've allowed the eye to stay open a little bit, but mostly it is squished shut.
The eyebrow sits rather low on the nose bridge as the tension forces it downward, while the latter half arches upward. This particular curve does a lot to convey the emotions and is worth paying extra attention to. Furthermore, I've added a little more lines around the eyes and under the brow just to really hammer in the look of the character's muscles contracting in agony.


For the pose: I'd personally try to establish more of a power-dynamic.
In the original, the victim was already held in a very awkward position, as forced by the perpetrator who is a lot taller, and who is holding him suspended somewhat above ground. I wanted to push this, so I brought the victim down just a little bit lower and bend his left leg more - so that it looked like he was nearly hanging by the perpetrators grasp.
On top of this, I pulled his right leg out and set it right next to the perpetuator's foot, so that it looked like the victim was trying to pull back, in an attempt to escape.
To counter this, I ensured that the perpetrator's stance was strong and well balanced so that he could hold the victim in place, this also included shoving one of his arms back to counter-weight the other.
I also played a bit with their height difference here, making the perpetrator tower and bend over the victim in order to make him seem more imposing and intimidating, which would assert his dominance in this particular composition.

- mod wackart ( ko-fi )

Looking for advice on anatomy and foreshortening, mostly. Marked the bottom of the chest and line of the spine in white because it was getting a little lost in my messy coloring, and included a rough sketch of the normal standing shapes.
I'm aiming for more raptor/humanoid than frog, which is what I feel like it's reading right now. Coloring advice would be cool, but I am more interested in help on how to keep the anatomy grounded in what is physically possible, while making it distressing in a horror creature sort of way. Thank you!
The blank eye was a really good, eerie touch, but imma leave it out, for now, to make the pose a little more consistent. I really like your thin, stick-like arms too, and tried to mimic them ( with little success as you can see ). It's a really nice pose!

https://www.rspb.org.uk/birds-and-wildlife/wildlife-guides/other-garden-wildlife/amphibians-and-reptiles/common-frog/
The reason you might read an amphibian of this creature is in part due to the structure of the legs looking identical to that of a frog, with the thick 'thigh' and skinny calf. The claws fanning out at the bottom also resembles that of the frog's long toes, and that coupled with the rich green colour makes the read overwhelmingly amphibian.
I shortened the calf of the creature too. It seems to boast the ability to stand upright somewhat, based on its vertical spine, although, running and walking with a leg structured like that, without some sort of healthy density to it could prove awkward. Especially, since based on the original picture - I gathered that its leg-to-torso ratio was pretty uneven, and it would need some pretty dense limbs to carry that sort of unbalanced weight.
I gave the legs a bit more balanced weight distribution to do away with the frog-leg read. As well as defined the claws a little more, adding the large talon in the centre. This should do away with the frog-resemblance somewhat.

Undoubtedly, the colour also has a lot to say about the amphibian read. Our classic fairytales almost always depict frogs in bright and vibrant green, which means that we associate said colour with said critter.
If you want to stick to the green palette, then I recommend you breaking it up with another hue, such as blue, yellow or grey-ish.
- mod Wackart ( ko-fi )

Anatomy and also maybe aesthetic (only if you want to though. anatomy is the big one). This thing is based mostly off of gorilla anatomy, with additional big cat for the back legs. I want the tail to balance it bc of the front being so heavy, but I can't figure out how to realistically do that. It walks on its knuckles because of large claws and does have thumbs, but they're not as opposable as a primate's. It's also meant to have pretty heavy fur but I didn't include that so the body would be more visible.
Man oh man! This is exciting. I love me some creature design.
This is a pretty unique creature too. I love how you included the skeletal structure - it just goes to show to what level of detail you've planned the creature, which is really impressive. I personally love mixing gorillas into my creatures too, due to how much you can push the proportions with it.
Now:
What you've used here is what is sometimes regarded as Cross design. What's that you ask? Well, it's one of two popular offsets for designing fictional concepts.
Crossdesign - As the name implies, crosses two- or more ideas to make recognizable but unique aesthetics. " A dog, AND a horse AND a fish " ( Ex: Catdog, the centaur, etc. ) This method is mostly used for creature and character design.
Contradesign- Like crossdesign, but phrased differently. It still mixes pre-established concepts, but treats the different inputs like 'opposites'." Cavemen, BUT WITH steam power " ( Ex: the underwater world in Sharktale, Zootopia etc. ).
The difference between these two are mostly -when- they are applied. But when it comes down to it, you can easily use both thought-experiments to develop concepts. What the two methods do, is to provoke your imagination into thinking up ideas consisting of two opposites/conflicting elements. Which will most certainly lead to an interesting visual.
Actively using this technique is rather simple. As it only serves to spark your thought progress. Using the two following statements when working with your idea can get you started.
Crossdesign: A _______ and a _________
Contradesign: A _________ but with ________

I've gone over the design and written out what I read from the design. When we design creatures and characters, it is imperative that we can immediately decipher their function and how they work together to make your character viable. if you can manage this, you are well on your way to mastering fictional design.
Anyway: as you can read from my notes, it comes forth as if you've mixed a lot of traits from both predator and prey animals. While also making your creature appear to be both ground-bound and acrobatic. The latter combo works just fine if we exaggerate the features right, but the first can confuse the viewer.
I have taken the liberty to assume that you wanted this creature to be a predator, due to its mixing of big cat, and gorilla assets ( gorillas usually regarded as herbivores, but has been proved to sometimes ingest meat as well ). And, its somewhat mean look.

I've gone all back to basics and drawn the general structure and weight distribution. For aesthetic purposes, I've pushed the contrast between the upper part and lower part of the body to an extreme. This is just to add a bit of flair and enhance the readability of just how 'heavy' this creature is on the front. This helps emphasize how much you -don't- want to be in the way once this thing comes hurtling towards you 😁
When creating creatures, you have the leisure of being able to go to the extremes and, more often than not, you'll find that pushing these proportions can make for some interesting visuals.

^ this is how I would go about everything. It might seem like a lot, but all I've really done is angle the spinal curve upward and straighten the neck to make the creature more capable of sustained sprinting. I've also supported the creature's structure with a good bit of muscle and tissue, allowing both ground-bound movement and climbing, as well as creating a bit of a dynamic between its massive front, and smaller rear.
Having tail as a counterbalance was a clever idea, since the creature -is- very heavy on the front. You were pretty on point with the length and build of it so I didn't change anything here.
These corrections can also work with prey-animals, of course with alterations such as lighter bodies and the inverted spinal curvature. But, the pushed proportions and critical eye for the creature's physiology will apply whenever you create fictional fauna.
This might seem like a lot, but I'm only coming at you with this much because I believe that you have all the potential to make it work, due to the skill level you've shown us. So, if it feels like I've eviscerated your design, it's simply because I've gone really in-depth and been really strict with the consistency and read. If you're up for all the alterations, remember that it's your creation and you can always pick and mix as you please.
Great work so far, really hope my take is not too far off the intended purpose of the critter.
- Mod Wackart ( ko-fi )
Anonymous asked:
Do you have any advice on commissioning and how to earn/handle money as an artist?
![]()

If we knew exactly what the key for earning a stable income as an artist on the internet would be, let it be known that we would gladly share it with all of you. However - as is, the fickle matter of gaining and maintaining business on the internet is still an enigma to most. So take this advice as guidelines and by no means requirements for success. Afterall, the most important part of launching youself and your business, is that your strategy is tailored to the specific services you offer, your comfort, requirements and standards.
Your personal limits / self respect
Before you go on ahead and put yourself out there, it is important that you do a bit of self-evaluation first. This is especially important if you plan on offering NSFW services to your potential clients. Knowing what you'll want to do, and what you defenitely do not want to do is crucial, and will save you a lot of hard or awkward situations down the line.
Some questions to ask yourself:
- How much time am I willing to put into commissions? ( how much time do I have for commissions )
- What are the general themes or subjects I woud like to be ordered to do, how do i make that preference visible?.
- Am I willing to work with NSFW content, and where are my limitations to this content.
NSFW content
If you plan on working with NSFW content, make absolutely sure that you know the laws about that sort of content, both in production and distribution ( and of course, never distribute NSFW content to minors ) in your area, to ensure that you don't land yourself in hot water.
If you distribute NSFW content, you might want to get at least cursory knowledge on how the distribution of such content works in the regions where you distribute to ( ie. where your clients are coming from ). Just to be on the safe side.
Always be mindful that a client can be a minor posing as an adult;
If the person is not in possession of their own credit-card (pay-pal), or there's a discrepancy between the account they are ordering from, and the payment information you recieve- you're better off doubling down and asking them to prove their age.
It is true that there are many ways that minors can forge an adult identity, but if you do your bid to make sure that your clients are of age in being critical of any suspicious information - you will be able to weed out some offenders and keep yourself out of risk of being accused of distributing to an inapropriate crowd.
That said, I have not personally experienced a minor trying to order off of me yet, so i daresay it is still a rare occurence that situations like these crop up.
Picking a personality profile
This is by no means a must-do for everyone. I just find it comforting to know that i have a uniform way of approaching my clients regardless of their standing in relation to me and my services.
When working as a freelancer ( as you will technically be doing when taking commission ), you are your own store-clerk. And like any store-clerk, you are expected to act in a certain way by your customers. Of course: keeping a polite and open tone with your clients is important, but how exactly that polite and open tone sounds when coming from you - is highly personalized.
I've met artists who will put on a big, broad smile, and get really involved with their client's gossip and sometimes even private life as part of their outward business-persona. Nothing wrong with that at all, i imagine they're going for the "friendly coffee-shop down the street" kind of vibe.
Personally I am more withdrawn when communicating with clients, usually staying somewhat formal and informative rather than getting into too much small-talk with my cilent.
This has nothing to do with who I am in private, where i love sitting around and chatting for hours and hours. It simply gives me a bit of respectable distance from my client and myself.
Not everyone needs to alter their behaviour at all when talking to clients, but if you like it when work-personality is a little bit seperated from private-personality ( esp if you, like me, is a goof-ball memelord with terrible humour who does NSFW art ) I'd consider how I would most comfortably interact with potential clients if i were you, and then practice the approach so that you can easily slip in and out of it.
Write a ToS
I spend forever explaining to my clients how things were going to go down when they would order a piece, before i sat myself down and wrote a proper ToS ( Terms of service ).
It took precious time out of my schedule and became a flat out chore whenever someone approached me and i had to explain the process. That's why i recommend every commercial artist who gets even just semi-regular orders in, to sit down and write their process, terms and conditions out in one document or post so that they can easily shove it at their client when they're putting in an order.
Saves you the trouble of having to type it up everytime someone asks' and also makes it easier to maintain a streamlined process, as you are not in danger of treating customers with different ToS unintentionally.


HOW IT'S DONE
In my catalogue i have three pages in my ToS. The first page describes the in's and out's of the process itself, by guiding the client through what's going to happen. Particularly when the client will be expected to give feedback, as my process has very fixed points in which the client will be able and allowed to suggest alterations to their piece.
Fixed amount of alterations vs. scope of alterations
Sometimes a client will want to keep suggesting edits, alterations or additions to an art piece for whatever reason. This can really drag out the workload, and potentially slow down the process of other orders in your queue.
When this happens, it is important that you take a look at the time spent on the piece, and the time spent on alterations. If you feel like the client is continously hitting you with edits that are prolonging the process beyond what you feel is worth the payment - politely inform the client that they are exceeding the typical amount of edits, and either let them know that their current edit is the last they will be allowed, or add a fee to the order to make sure that you are compensated for the extra time. Do not start working on the edit until the client understands the new terms for the order, and do not start until you have recieved any extra payment that you may have imposed.
This may seem very scary the first couple of times. As the client can potentially break off the collaboration with you ( which is why you should charge the baseprice of the commission up-front. more on this later ).
But remember, you are the one with the product - and if you've taken it first, the due payment, and most clients would not want to part ways with the two because of a cap on edits. And if they do anyway, you will still have been paid for the time spent.
Your time is precious, treat it as such.
YOUR RIGHTS, MY RIGHTS
In your ToS i recommend that you take a snippet out to talk about the rights of the work produced. Typically, when a product ends production, some or all rights are sold along to the client who ordered. However, if you want to make sure that you can use the material for marketing purposes ( say, as an example image in your portfolio, or as a graphic for sale's campaigns ) then you must make your client aware of this beforehand.
Personally, i have arranged it as such, that my clients acquire the right to share, edit and redistribute the image as much as they want with no extra fees, but in return, i have the right to use the image for promotional material. As well as repurporsing all unused material in the process, that didn't result or contribute to the look of the final piece as i see fit.
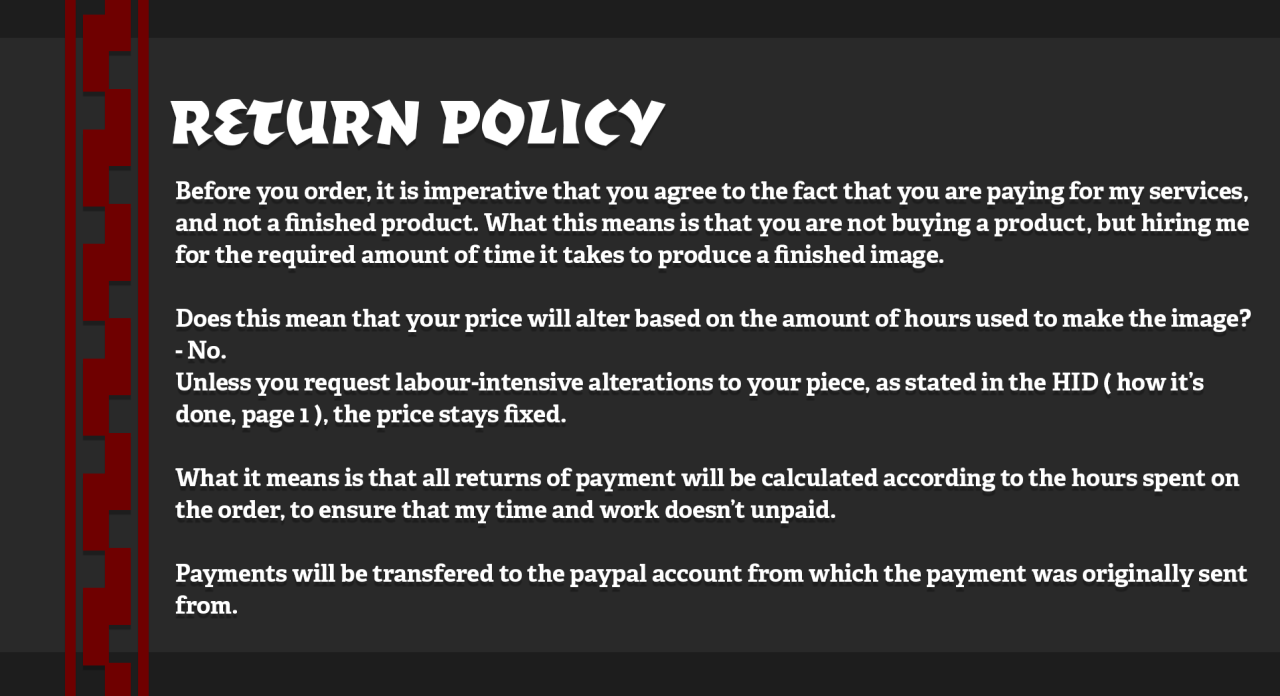
RETURN POLICY
It might happen that a client is suddenly unable to continue on with their commission process. In a cases like these, it is very important to have a set return policy in place. And it is also incredibly important for the comfort of your clients to know what happens to their money, and their ordered image - should something suddenly make them or you unable to proceed with their image.
For me, after having been through a few unfortunate clients who left me with partial or no payment at all - i have implemented a rather strict return policy that priorities that the work i have already made is paid, in case the client pulls out.
( If i am the one to pull out, the refunding is in most cases the whole amount, and the client still recieves the material made so far and the rights to distribute, as part a little bit of an apology/goodwill incentive )
To make sure that you can give partial returns on payment, you need to make it crystal clear to the client that they are not paying you for an image, but for your time and expertice. By telling your clients this, you are basically adressing that from the moment you sit yourself down and start working on a piece, you have the rights to the payment recieved for it.
Whether or not you want a no-return policy or partial-return policy in place for unfinished pieces is up to you, though naturally - people generally like it when they know there's a chance they can get at least some of their money back if something happens to go wrong on their end.
Pricing
Pricing commissions is probably one of the most talked about topics in the online freelancing illustration business. How do you price something just right? Is it too much, or too little.
It really comes down what you feel like you want to charge.
There is of course the debate about artists undercharging clients and thusly going underpaid- which can skewer the clients outlook on the value of an artists' time. But i'm not here to tout which side of the debate you oughta take.
Just make sure that you feel that you are paid enough for your work. Afterall, if a person doesn't like what they see and the pricetag on it, they can find someone else.
ALWAYS, have a portfolio available, either in an online gallery or your own website or downloadable PDF - where your potential clients can get an overview of your style, skill-level, strenghts and weaknesses. It is very important to be transparrents with your abilities to potential customers to avoid disapointing them, which may lead to them being discouraged from recommending you to someone else.
Do remember that your pricing will impact the kind of clients you attract. Cheaper commissions prices may attract a younger, less cash-solvent demographic, who seek out the cheaper options. While more expensive pricing may attract clients with a more stable economy, who will be looking to spend money on unique or quality commissions.
I have personally bumped up my prices quite a few times as i've cultivated my skills, developed a style unique to me, and gotten a few credentials and a degree. All of this to make sure that I need to land less deals to cover my bills, while also attracting a demographic with a somewhat stable income.
Charge upfront
I will wholeheartedly recommmend that you charge your custommers upfront to prevent either scamming, or them suddenly being out of cash to pay you. If you work with larger clients like companies or the sort - you may be inclined to take pay after the work is done, but with private clients with private economies that are much more prone to being thrown off by life occurences, charge upfront.
If your clients are unsure about this - ensure them that the money is safe and secured on a seperate account ( cause my god, you do not want to start mixing payments for unfinished commissions with your private economy, mark my words - that is a big no no! ) where they will remain in case returns are to be made. Remember, you are paid for your time - not an image.
Make a pricing sheet or catalogue
There are a great number of ways to advertise your commissions. Most important though is that your advertising should state a few things clearly.
- The overall look of the finished product with clear indication as to what will be included in the final image.
- The price
- Your contact info
I've seen a number of price-sheet formats out there, but here are some of the more common ones i come across:
Sketch to shading:

These examples clearly layout what each level of polish costs, and is suitable for artists who want to focus their service around providing images that have variable levels of finish.
Composition:

I've seen these used mostly with artists who will always default to full colour and shading in their works. These sheets focus on the amount of the character that would need to be shown in the final image. They are primarily targetting potential clients who are moreso focused on having their character drawn on their own - than on having them included in larger illustrations.
The catalogue:
My personal preference is making a catalogue ( link here for reference )
For me; having the freedom to define exactly what kind of commissions i want to do, and being able to price them individually without having to change up my entire pricechart to keep up with the new one. ( while also being able to make individual sales-campaigns on each format ) has helped immensely in vetting the kind of material i am requested to do. It has also made it easier for my clients to not only figure out my pricing, but what my range of services cover. While also being inclined to read my ToS while they're there.
It is a little bit of a hassle to upload since some platforms do not support this multi-picture format, though for platforms such as tumblr, or deviantart + furaffinity, where you can slot your commission types in pretty easily on its own little tab, they work a charm.

Sales and events
Occassionally, a sale can boost your traffic a bit, and maybe land you some more commissions for a limited amount of time. Just remember to clearly state in your post ( or in the graphic ) when the sale ends. So that people won't approach you after the sale is over, expecting to get the campaign-price on something.

Posting
Part of my PR strategy is posting all commissions i've made publicly to the apropriate platforms ( NSFW content for NSFW platforms, etc ). So that the material you produce becomes part of the promotion cycle. People will come to know what your standards are like when it comes to the produced material, and will also get a feel for what other people might buy off of you. Besides, posting client-requested material often means that you 'll get a more varied content stream, which can show off more of your skillset than what your typical content would.
Aside from posting your finished commissions, flaunting your pricesheets or catalogue, and other content regularly is important in keeping traffic coming your way. Semi-regular posting will keep you on the front page of your platform for a limited time, but getting involved with groups or forums for specific themes or subjects can help you spread your appeal even further, and perhaps reach the people with the right interests.

Money services
I am personally still using paypal for my commissions, in part due to its accessibility for those outside the states. Though - there are many alternatives to paypal that offer similar or lower rates on their transactions, and more freedom as to what services you can peddle over it. ( Stripe and Google-pay are two of the services that come to mind ). If you end up using paypal, remember to tell your customers not to label their payment with any hints of NSFW content that might be in the image - as that has lead to artists having their accounts frozen in the past.
Some also propose that you tell your customers not to include the word " commission" in their payment note, as it messes with paypal's internal algorithm too.
Taxes
Important: check the tax-laws and regulations in your area to make sure that you are paying the right amount of taxes on your work, as to prevent yourself from being slammed with a tax-bill later when you least expect it.
I am personally working as a freelancer under a specific circumstance, that is dictated whether or not i earn over a certain amount of money, which means that i have to account for my own tax-payments. I do this by simply splitting my payment in half and saving one half for taxes ( which should cover any tax-bill with some in spare in the unlikely case that i miss filing one payment ), and keeping the rest as income.
This method may not work for you, and depending on your specific region, tax laws will be wildly different - so make sure to look it up for yourself.
Correspondence
No-brainer here, but just to include it: when corresponding with your client, make sure to stay polite and proper ( even if you have a very friendly/outgoing sales persona ). Remember to communicate clearly, and leaving nothing vague - as to avoid the risk of any misunderstandings.
And lastly, give yourself the courtesy of logging out once in a while. It is totally fine to have daily correspondence with a client if the job begs for it, but don't let them hawk you more than you feel is necessary. It is completely fine to pull the plug and just work for a bit if you are not discussing alterations or feedback in the designated feedback periods.
Let yourself work.
Platforms / find your demographic
We all have to start out somewhere, but simply throwing your stuff out on facebook might be a waste of effort. If your art is partial to a certain demographic ( like how anthro-art is partial to the furry-community ), then you might be better off pouring your energy into scoping out the different forums and platforms from where your content will hit its target demographic with the least work on your part.
You can always branch out into multiple platforms, later. Afterall trying your luck with new platforms, only to realize it didn't work out ( or in fact, did work out ) like you thought it would is a stable part of trying to find out where your niché and your crowd is.
Just remember that managing a social media platform often takes a whole lot of time, so watch out for which platforms give you the most interaction and clout, and try to expand your presence from there, as your first priority before foraging elsewere into unknown territory.
And of course, remember to let people know where they can find you elsewere on the internet, if they stumble into your profile, blog or gallery on your main platform.

- Mod Wackart ( ko-fi )
Anonymous asked:
Question: How do I put more "energy" into my artwork? I feel like I'm having trouble really giving life to the characters I draw. Like for example, I'll draw two characters dancing, but they would look kind of...Robotic? Idk how to describe it. I'll try to use those "action lines" but it'll still stiff. Any advice?
![]()
Hey Redliners!
You might have noticed that we just published a whole load of posts at once. This is because it has been decided that this blog will proceed with its little identity change.
This means that this blog soon will become RedLineStation's BuildGuild expansion. RedLineStations basics and anatomy help can still be found in our budding community on discord:
https://discord.gg/tVtcUC5QZd
Where you can find help and guidance for your art fundamentals through the discord channels. Here you can receive help both from mods and community members alike, as well as join in the regular events that the mod-team host.

It has been a privilege to work with RedLineStation as part of its art fundamentals blog interacting with our members and other mods on the discord server is like talking to one big extended family. But for now, I hope you guys will help us welcome the new face of this particular blog:

When we put out a post talking about this new direction for RedLineStation we received a bunch of positive feedback, which means that we now have the courage to roll out the new venue.
RedLine Build-Guild will, much like RedLineStation be part of the RedLineStation family. Here, we will discuss anything that has to do with worldbuilding and design for visual storytelling. That means anything from character design, storyboarding to the conceptualization of lore and inspiration/motivation.
Just like the previous format of this blog, a lot of the content will be user-prompted through our askbox. Which will be open for any general questions about the design of a visual narrative and everything surrounding it.
On top of that, we will, again, just like the original RedLineStation; offer personalized feedback. Where followers can send in their material and have it reviewed.
RedLine Build-Guild will also feature a regularly scheduled Worldbuilding Guide, which will be published in short chapters here on the blog. This guide will help you with some of the more meta-contextual aspects of worldbuilding. While its accompanying writing/design prompts should help you explore your world and story from angles you might not have previously.
As part of the Build-Guilds curriculum, we will also be showcasing other worldbuilders and authors who have mastered the art, so that you won't just have to hear us drone on about our own individual biases exclusively but hear about the methods of creators around the world too.
A more thorough walkthrough of Build-Guilds content and format will come out later. For now, just know that the revamp is in the works and that we are currently writing, drawing, and planning a heap of content to start the blog off in the new year.
If you have any questions at all, feel free to ask them as a 'reply' to this post beneath. Mod Wackart will be around to answer as many questions as possible as quickly as possible.
Cheers!
Can't wait to see you all again
- Mod Wackart
Source: https://theredlinestation.tumblr.com/post/185506043050/do-you-have-any-advice-on-dragon-wings-my-best
0 Response to "Cute Funny Drawings Tumblr Cute Fat Green Dragon Drawings"
إرسال تعليق